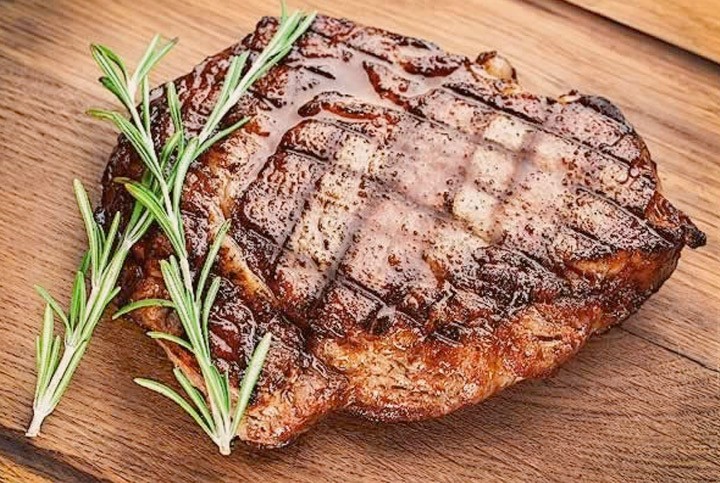
The next time you grill a steak (or any cut of meat!), impress your family or friends with perfectly executed crosshatch grill marks. Not only will your food look great, but those brown, crusty sear marks will add even more flavor.
Grill marks are created by what’s known as a Maillard Reaction. This is what creates that great grilled flavor—and that perfectly grillled look.
Here’s how to master the technique:
- Pre-heat your grill to high, direct heat.
- Oil and season your meat.
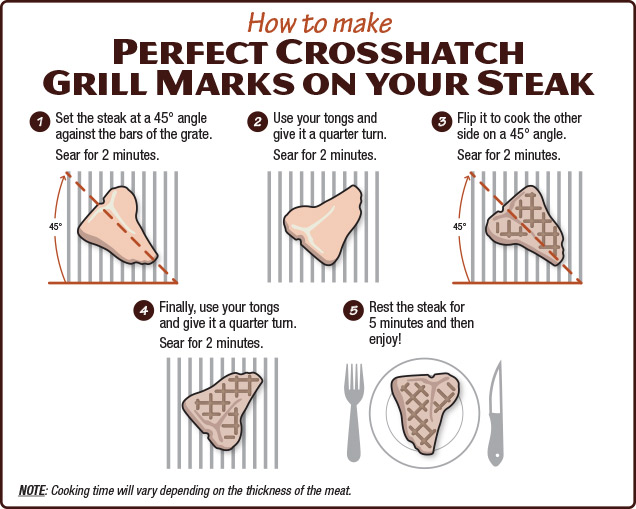
- Set your meat at a 45° angle against the bars for the cooking grate. Sear for two minutes.
- Next, give the meat a quarter turn from its starting position and sear for another two minutes.
- Flip and repeat steps 3 and 4 to achieve the same pattern the other side of the meat.
If you are still unsure, we’ve created this visual guide to walk you through the steps. Once you know how to do it, it’s easy to grill a picture perfect steak.

What Is The Reverse Sear Method?
Another popular way to create those classic grill marks is by using what is called the “reverse sear” method.
Instead of searing your steak or meat over high heat, then reducing the heat to finish cooking, the reverse sear method starts by cooking meat in a low oven or grill, then ending over high heat. Some grillers claim that reverse searing offers a number of benefits, including:
- More even cooking
- Better browning
- More tender meat
- More forgiving and less likely to overcook
To reverse sear, follow these steps:
- Season your steak or meat and prepare your grill for indirect heat cooking.
- Place the meat on the cooler side of the grill (not directly over the heat source).
- Cook the meat till it’s about 10-15°F below your desired temperature.
- Turn your direct heat burner up to maximum heat. Transfer the meat to the hot side of the grill and sear for about 30-45 seconds. Rotate your meat a quarter turn from its starting position and sear for another 30-45 seconds.
- Flip and repeat the process on the second side.


