If your gas grill is firing unevenly, struggling to light, or leaving cold spots across the grates, a worn burner is often the culprit. For many backyard grillers, the first question is: How much does a gas grill burner replacement cost, and is it worth fixing instead of replacing the whole grill?
In most cases, replacing a burner is one of the most affordable and satisfying grill repairs you can make. This guide breaks down realistic burner replacement cost ranges, explains what other parts may need attention, and helps you decide when repair makes sense for your grill and your budget.
Why Replace Your Grill’s Burner Instead Of Buying New
Burners take the most abuse of any gas grill component. They sit directly over heat, grease, moisture, and food drippings every time you cook. Over time, that wear shows up in a few familiar ways:
- Uneven or weak flames
- Large flare-ups in specific spots
- Rusted or cracked burner tubes
- Ignition issues even with a working igniter
For many grillers, replacing a burner is less about saving money and more about keeping a grill they already know and trust. A well-built grill with a solid firebox and lid can cook great food for well over a decade with periodic part replacements.
There is also a sustainability angle. Repairing a grill keeps metal components out of landfills and reduces the need to manufacture and ship a full replacement unit. Many GrillSpot customers proudly maintain grills that are 10 to 15 years old with nothing more than routine burner and heat plate swaps.
Typical Costs Of Gas Grill Replacement Parts
One of the biggest advantages of repairing a grill is not having to replace everything at once. Most grillers replace parts as they wear out, spreading costs over time. Below are typical burner replacement cost ranges based on current market pricing across specialty retailers and big-box stores.
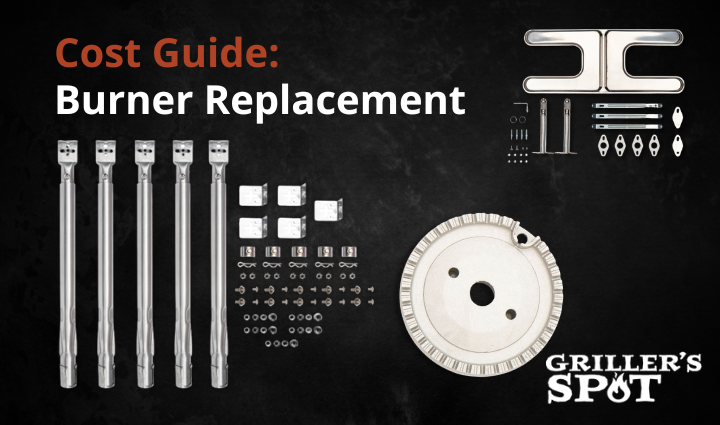
Main Burners
- $20 to $90+ per burner
Stainless steel burners generally cost more than porcelain-coated options, but they also tend to last longer. Pricing varies by grill brand, size, and whether the burner is OEM or universal.
Side Burners
- $25 to $80
Side burners are often brand-specific, so measuring carefully is key before ordering.
Heat Plates Or Flame Tamers
- $15 to $50 per piece
These components protect burners from drippings and help distribute heat evenly. They are often replaced at the same time as burners.
Igniters And Control Knobs
- $10 to $40
Ignition systems are relatively inexpensive and can restore easy starts if your grill clicks but does not light.
Cooking Grates
- $25 to $100
Cast iron grates typically cost more than chrome-plated options but deliver stronger sear marks and heat retention.
GRILL SPOT TIP: GrillSpot offers replacement burner kits and individual parts, rather than full refurbishment bundles. This lets you replace only what your grill actually needs.
When Repair Makes Sense Beyond The Cost
You will often see advice that compares the cost of repairs to the price of a new grill. That kind of rule misses what really matters to most grillers.
Repair makes sense when:
- Your grill still heats evenly after part replacement
- You are familiar with how it cooks and controls temperature
- The firebox and lid are structurally sound
- You enjoy maintaining your equipment
Many long-time grill owners find real satisfaction in bringing an older grill back to life. Replacing burners, heat plates, and grates can make a grill feel almost new again without the learning curve of a replacement model.
Environmental impact matters too. Extending the life of a grill reduces waste and lowers the carbon footprint tied to manufacturing and shipping new equipment.
How To Choose The Right Replacement Parts
Check Model Compatibility
If you have your grill’s model number, search GrillSpot for compatible parts.
Measure Your Existing Parts
If the model number isn’t available, remove the old burner and measure length, width, mounting style, and venturi location. Small differences can affect flame pattern and ignition.
Installation Tips And Maintenance For Long-Term Value
Most burner replacements are straightforward DIY projects and can be completed with basic tools and a little patience. Need extra guidance? Check out our grill maintenance and repair tips for practical how-tos and upkeep advice.
Basic Safety And Installation Tips
- Let the grill cool completely before you start, including grates, burners, and heat shields
- Disconnect power for electric parts: unplug the grill or remove the battery from the igniter
- Work in a well-ventilated area and never test for leaks near any flame or spark
- Keep a spray bottle of soapy water and a fire extinguisher nearby before you turn the gas back on
- Take a quick photo before disassembly so you can reinstall burners, carryover tubes, and wires correctly
- Use the right tools and avoid stripping screws; rusty fasteners can slip and cause cuts
- Watch for sharp edges on heat plates, firebox panels, and sheet metal, deburr or handle carefully
- Clean out grease and debris while the grill is open to reduce flare-up risk later
- Inspect the hose and regulator while you are in there, replace if cracked, soft, swollen, or chewed
- Do not overtighten burner screws or manifold fittings; snug is usually enough
- After your leak test, do a short “test burn” with the lid open for a minute, then recheck for gas smell
- If you smell gas at any point, shut everything off and stop; do not try to “burn it off”
Ongoing Maintenance That Extends Burner Life
- Clean burners and heat plates on a schedule: deeper clean about every 1 to 3 months if you grill often, or every few months for lighter use.
- Check the flame pattern periodically: look for even flames along each burner. Yellow, weak, uneven, or missing flames can signal clogs or corrosion.
- Keep the grill dry inside: after cleaning or rain, air it out and let it dry fully before closing the lid or covering to avoid trapped moisture.
- Do a quick seasonal inspection: check for rust-through, cracks, heavy flaking, warping, and blocked burner ports or carryover channels.
GRILL SPOT TIP: A quick seasonal inspection plus routine cleaning can help prevent premature burner failure and keep heat more consistent.


