This guide covers everything you need to know about cooking rotisserie chicken on a grill, including how to put a chicken on a rotisserie, cooking techniques for both gas and charcoal grills, how to make smoked rotisserie chicken on the gas grill, and essential tools for success.
When you think of rotisserie cooking, what’s your first thought?
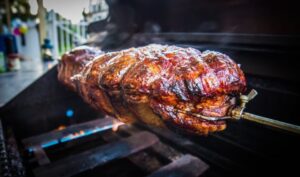
If you pictured a whole chicken sizzling as it slowly spit roasts, you’re not alone. It’s the first thing we think of too—and for good reason.
What makes a rotisserie chicken so special (and anything cooked on a rotisserie, really) is that it bastes in its fats and juices while it rotates and cooks, resulting in tender, flavorful meat you just can’t quite replicate in an oven.
We’ve talked a lot about how to rotisserie, what you can rotisserie, and other rotisserie-related topics on this blog, but we haven’t devoted much time to rotisserie’s best friend: the whole chicken.
In this post, we’ll cover everything you need to know about cooking a rotisserie chicken on a grill, including:
- How to put a chicken on a rotisserie
- How to rotisserie chicken on a gas grill
- Smoked rotisserie chicken on the gas grill
- How to rotisserie chicken on a charcoal grill
- Bonus tips for perfect grilled rotisserie chicken
- Essential tools for rotisserie chicken on a grill
Let’s get grilling!
How to Put a Chicken on a Rotisserie
Let’s start at the beginning—how to put a chicken on a rotisserie. Follow these steps:
- Truss the chicken using butcher’s twine. Cut a piece at least four times longer than the length of the bird. Follow the step-by-step tutorial by Weber for detailed instructions on how to truss a chicken for rotisserie grilling.
GRILL SPOT TIP: Don’t skip this step! Trussing the chicken prevents wayward wings and legs from dangling too close to the heat, where they can quickly burn and char. By trussing the chicken, you keep all these dangly bits contained, which means your chicken can cook evenly (and everything gets a proper juice-baste bath).
- Pat the chicken dry and insert the spit through the cavity of the chicken. You can also stuff the chicken with flavor-packed items like lemon or orange (cut into wedges), quartered onions, shallots, sprigs of thyme or rosemary, and crushed garlic. Just be aware that stuffing a rotisserie chicken might increase its total cooking time.
- Slide the first spit fork onto the spit rod and insert it into the chicken thighs. Slide on the other spit fork and insert it into the breast.
- Make sure the chicken is centered and balanced on the spit so it rotates evenly. If it’s not properly balanced, your rotisserie motor will have to work harder to keep the spit spinning. Once the chicken is balanced, tighten the forks to stay in place.
After the chicken is mounted, you can rub it with olive oil and sprinkle on your dry rub or spices. You can also do this before you mount the chicken, but we find that a lot of the spice rub gets rubbed off in the mounting process, so we prefer to do it afterward.
Voila! You’re ready to rotisserie.
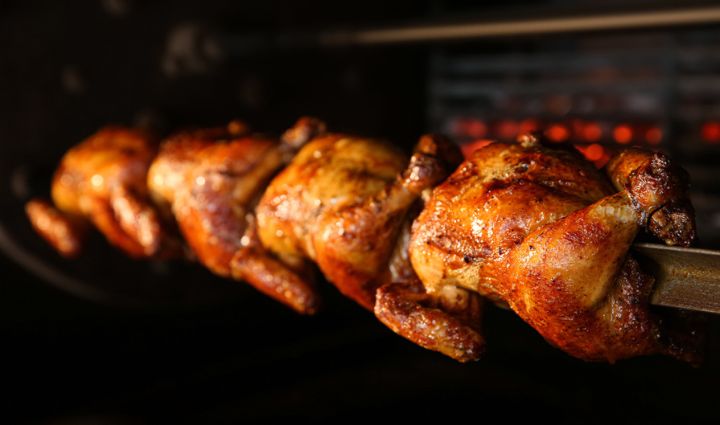
Want to cook more than one chicken? You can mount two or even three chickens onto the same spit, as long as your rotisserie kit can handle the weight. Simply slide the second (or third) bird down the spit rod till it’s pressed up against the first, truss it, and slide on the spit forks. You want all your birds firmly secured between the spit forks, with no spaces in between.
Remember, grilling multiple birds at once will increase your overall cooking time.
How to Rotisserie Chicken on a Gas Grill
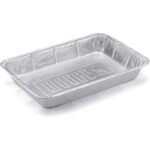
- Prepare your grill. Remove the cooking grates and place a shallow baking dish or drip pan in their place to catch any drippings and prevent flare-ups.
- Preheat your grill to high heat. Mount the spit rod using heat-safe gloves, start the motor, and close the lid. Sear the bird(s) over high heat for about half an hour.
GRILL SPOT TIP: Poke a few holes in the skin to allow the juices to gently run out. You’ll get crispier skin this way!
- Turn off the center burner (or two center burners on a four-burner grill) and reduce the heat of the outer burners to medium to create direct and indirect heat zones. The indirect zone/unheated burners should be located directly below your bird.
- Close the lid and let the chicken cook at medium heat (around 350 degrees). After an hour, stop the motor and check the temperature.
- Your chicken is done when the internal temperature of the thickest part of the breast registers 165 on an instant-read thermometer. If you aren’t quite there yet, restart the motor, shut the lid, and continue cooking. If you’re cooking multiple chickens, check every bird. The center one will cook the slowest. A single chicken will take about 60-90 minutes depending on the size of the bird.
GRILL SPOT TIP: Poke a few holes in the skin to allow the juices to gently run out. You’ll get crispier skin this way!
- Once you hit 165, stop the motor and remove the spit from your grill using heat-safe gloves. Remove the spit forks and slide the bird(s) off the spit rod, then tent the cooked birds and let them rest for at least 15 minutes before carving. Enjoy!
Shop for rotisserie accessories:
Smoked Rotisserie Chicken on the Gas Grill
Craving the taste of smoked rotisserie chicken? With the right tools, you can easily cook your own smoked rotisserie chicken on a gas grill—no dedicated smoker or charcoal grill is required.
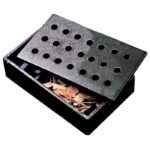
All you need is a smoker box and wood chips. If you don’t have a smoker box, it’s not a dealbreaker—you can DIY one with tin foil.
To make smoked rotisserie chicken on the gas grill, follow these steps:
- Fill your smoker box with wood chips and place it over direct heat. Freestanding smoker boxes can be placed anywhere on the grill—on the grate, under the cooking grates, between the heat plates, or on ceramic briquettes. It’ll take about 15 minutes for the chips to start to smoke.
- Once you see smoke, place your prepared chicken (mounted on the spit rod) on the grill. Follow the instructions listed above.
Don’t have a smoker box? Read our guide to turning a gas grill into a smoker for DIY instructions using nothing but tin foil.
Shop for smoking tools:
How to Rotisserie Chicken on a Charcoal Grill
Want to rotisserie a chicken on a charcoal grill? Follow these steps:
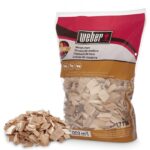
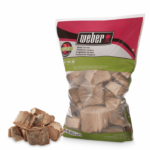
- Remove the cooking grates, light your coals, and preheat your grill to high. For smoked rotisserie chicken, you can also add wood chunks to the coals. Pecan, hickory, and cherry are good options. If hickory hits a bit too strong for your taste, try apple wood.
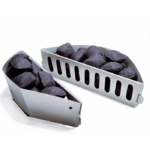
- Once your coals are hot and ashy, rearrange them to create direct and indirect heat zones. A charcoal basket or two can help you stack the coals. Set a drip pan below where your bird will spin to collect any drippings then mount the spit.
- Start the motor, close the lid, and let your bird cook. It’ll take about 45 minutes for every 2.2 lbs of chicken over medium heat.
- Once you hit 165 degrees in the thickest part of the breast, stop the motor and remove the spit from your grill using heat-safe gloves. Remove the spit forks and slide the bird(s) off the spit rod, then tent and let them rest for at least 15 minutes before carving. Enjoy!
Shop for charcoal grilling tools and accessories:

Bonus Tips for Perfect Grilled Rotisserie Chicken
So you’ve got the basics for how to rotisserie chicken on a grill. Level up your rotisserie chicken game with these bonus tips:
- Brine your chicken before grilling. Brining helps add flavor and keeps your bird moist while it cooks. Brining your chicken is simple—mix a gallon of cold water with ¾ cup kosher salt and ½ cup brown sugar, stir till the salt and sugar dissolve, then submerge the chicken in the liquid for 4-6 hours (or overnight). When you’re ready to cook, pull out the chicken, dry it off, and prepare as usual.
- If you’re an experienced briner, try swapping your usual brine for buttermilk. Our favorite buttermilk brine comes from chef Samin Nosrat. She roasts her chicken, but you can absolutely use this recipe on the rotisserie and the results are succulent and, in our opinion, completely unmatched by any other prep method. You don’t even need a dry rub.
- Add onions and potatoes to the drip pan. They’ll slowly roast in all those delicious drippings and subtly flavor your chicken as they both cook. If you want to cook other vegetables, you can add them as well—just wait till you’re closer to the end of your cooking time. Note: Adding veg to the drip pan will increase the overall cook time.
- Dark meat, such as thighs and legs, has a tastier texture when it’s cooked to 185-190 degrees—any lower than 170 and it can feel rubbery. When you test the temp of your bird, look for 165 at the thickest part of the breast, and 180+ in the thigh.
Essential Tools for Rotisserie Chicken on a Grill
These essential tools for perfect rotisserie chicken on your grill will make the cooking process smoother—and help you achieve the best possible results:
- A rotisserie kit. But you already knew that!
- Drip pans. Disposable foil drip pans are perfect for catching drippings and saving your heat plates. Since they don’t conduct heat very effectively, they won’t affect the cooking time too much (though they will extend the timeline a little). You can simply toss them in the trash or recycle them when you’re done, or, if you’re limiting your consumption of single-use kitchen items, you can also wash them out and use them again.
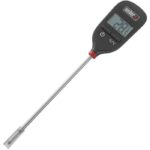
- Instant-read thermometer. With an instant-read thermometer, you can quickly check the status of your bird as it cooks, reducing the amount of time you leave the lid open and helping to retain heat. We normally recommend a probe thermometer for longer cooks, but anything with a wire will just get wrapped around the spit as the chicken spins. So in this case, an instant-read thermometer is your best option.
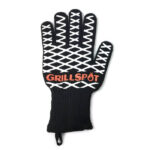
- Heat-safe gloves. Don’t try to mount or remove your rotisserie without heat-safe gloves! Oven mitts work in a pinch, but gloves offer greater dexterity.
- Ambient temperature probe. This thermometer simply sits somewhere inside your grill (usually on the cooking grates) to measure the temperature of the cooking chamber. (Yes, we know your grill has a built-in thermometer, but these aren’t always accurate.)
- Smoker box. If you want to make smoked rotisserie chicken on a gas grill, invest in a smoker box. It’s easier than DIYing your own with tin foil and doesn’t create waste.
- Charcoal baskets. If you’re cooking rotisserie chicken on a charcoal grill, charcoal baskets can help you corral your coals and create heat zones more easily than trying to stack them into piles.
Shop for essential rotisserie tools:
Get Grilling
Mastering the art of rotisserie chicken on a grill is a game-changer for any backyard BBQ master. Whether you’re using a gas or charcoal grill, the key to achieving that tender, flavorful chicken lies in the slow, succulent, self-basting process that is unique to rotisserie cooking.
From the initial preparation and trussing your bird to maintaining the perfect heat zones and which essential tools you need, we’ve covered everything you need to know about how to rotisserie chicken on a gas grill, rotisserie chicken on a charcoal grill, and more. So fire up your grill, gather your supplies, and let’s get grilling!