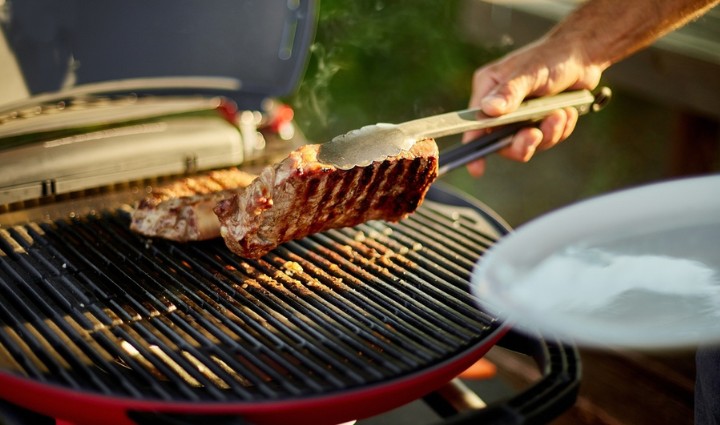
Grilling thick cuts of meat, whether it’s a bone-in ribeye, pork chop, lamb loin, or tomahawk roast, takes more than just high heat. Without the right approach, the outside could char while the center stays undercooked (or worse, dries out entirely).
In this guide, we’ll share clear techniques and hands-on safety tips so you can grill thick, juicy cuts of meat with confidence using tools you already have.
Step 1: Choose the Right Cut & Prep It Properly
Pick Well‑Marbled, Thick Cuts
If you’re grilling thick cuts, look for cuts with visible marbling and some natural fat. This helps retain moisture and flavor during longer grill times. For example:
- Beef: Ribeye, strip loin, brisket, tomahawk, tenderloin
- Pork: Bone-in chops, pork shoulder, double-thick loin
- Lamb: Loin chops, racks, leg of lamb (butterflied or bone-in)
If you want to go premium, dry-aged meats offer even more flavor and tenderness.
Dry Brine to Boost Flavor and Moisture
Coat your meat with kosher salt and refrigerate uncovered for at least 45 minutes, or up to 24 hours for larger roasts. This dry brining process helps break down proteins, enhances browning, and improves moisture retention.
Step 2: Master Two-Zone Grilling and Smart Searing
Thick meat cuts need flexibility: high heat for a crust and indirect heat to finish without overcooking. To do this, you’ll need a two-zone grilling setup.
Set up your grill with one hot zone (direct heat) and one cooler zone (indirect heat, 225–350°F). This gives you complete control to sear and then finish slowly.
Related Guide: Direct vs Indirect Grilling Methods
Reverse Sear Method
Start by slowly cooking the meat in the indirect zone until it’s about 10–15°F below your target doneness.
Then, move it over to high heat to quickly sear each side before serving.
The reverse sear method works best for cuts over 1.5 inches thick, such as thick chops, bone-in steaks, lamb racks, or smaller roasts.
Related Guide: Sear vs. Reverse Sear: When & How To Reverse Sear on a Grill
Sear-First Method
You can also sear both sides of the meat over high heat (1–2 min per side) first, then slide it to the cooler zone to finish gently. This is especially effective on charcoal grills or mixed-fuel setups.
Grilling Methods Comparison: Reverse Sear vs. Sear-and-Slide
Method | Best For | Heat Setup | Steps | Pros | Cons |
Reverse Sear | Very thick cuts (1.5”+) | Start indirect, finish direct | 1. Cook slowly on indirect heat to ~10–15 °F below target 2. Finish with 1–2 min sear per side | Edge-to-edge doneness Better crust control | May take longer Needs thermometer |
Sear-and-Slide | Medium-thick cuts | Start direct, finish indirect | 1. Sear quickly over high heat (1–2 min/side) 2. Slide to cooler zone to finish to temp | Easier timing Good crust & moisture | Less precise than reverse sear |
Step 3: Monitor Internal Temperature (Not Just Grill Temp)
Grilling thick cuts by instinct alone is a risky endeavor. Use a reliable instant-read or probe thermometer to monitor internal temperature (not just the grill).
Internal Temperature Guide by Doneness
Meat Type | Doneness | Internal Temp (°F) | Notes |
Beef / Lamb | Rare | 115°–120° | Cool center, very soft—pull early and rest |
Beef / Lamb | Medium-Rare | 120°–125° | Juicy red center, ideal for flavor and tenderness |
Beef / Lamb | Medium | 130°–135° | Firm texture with some pink left—watch for carryover heat |
Pork | Medium | 140°–145° | USDA safe temp—still juicy if rested properly |
Poultry | Safe to Eat | 165°+ | Use indirect heat and always rest before slicing |
GRILL SPOT TIP: Steaks and chops continue to cook after they leave the grill. Pull them about 5°F before the target temp to account for carryover.
Keep That Lid Closed
Every time you lift the lid or open the grill, you lose heat and control over the cooking process. Lid discipline is key to maintaining consistent temps.
Step 4: Butter Basting, Resting, & Safe Slicing
Baste with Butter or Compound Butter
Adding butter during the final sear or resting stage is a simple yet effective trick that packs a significant punch. Whether you’re using a skillet or the grill grates to cook your meat, adding a small amount of butter on top of each piece boosts flavor and locks in moisture.
As it melts, butter creates a nutty, savory layer that complements grilled meat. It also forms a protective barrier, helping keep juices inside where they belong.
There are two simple ways to add butter:
- Create a compound butter and let a dollop melt over your meat while it rests. Compound butter is simply butter mixed with aromatics and other flavors, such as herbs, garlic, finely chopped bacon, or caramelized onions. Mix the butter, then form it into a log with the help of plastic wrap, and refrigerate until firm. Slice off the coins and let them melt while your meat rests.
- Butter basting can be done using a skillet on your grill. When you’re in the final searing phase of cooking, add a pat of butter to the skillet along with some minced garlic and sprigs of rosemary and thyme. Use a heat-proof glove to tilt the skillet so you can spoon the butter and herb directly over your meat as it cooks.
Rest for 5–10 Minutes
Resting your grilled meat is one of the most important steps for getting great results, especially with thicker cuts. When meat comes off the grill, the juices are concentrated in the center. If you slice too soon, all that flavor runs out onto the cutting board instead of staying in the meat where it belongs. Letting it rest allows the juices to redistribute throughout the meat, ensuring every bite remains tender and juicy.
As a general rule, rest smaller cuts, like steaks and chops, for 5 to 10 minutes, and larger roasts or briskets for 20 to 30 minutes. Tent the meat loosely with foil to help it retain heat without trapping steam.
Always Slice Against the Grain
Cutting meat against the grain makes a big difference in tenderness. By slicing across the muscle fibers instead of along them, you shorten those fibers, which makes the meat easier to chew and more enjoyable to eat.
This step is crucial for tougher cuts, like flank or skirt steak. A good slice can turn a chewy piece into something juicy and satisfying.
Troubleshooting: What to Do If Your Meat Ends Up Dry
Repurpose Creatively
Dry meat isn’t wasted! It can be transformed into a variety of delicious dishes, ensuring that no flavorful bite goes unused. Here’s how to turn it into something succulent:
- Warm meat salad: Thinly slice or shred dry meat and serve it over greens, grains, or roasted veggies. A tangy vinaigrette or warm dressing adds moisture and brings the meat back to life. Try it with leftover pork loin, arugula, shaved parmesan, and mustard vinaigrette.
- Stir-fry with veggies and sauce: Chop meat into small pieces and toss it into a hot skillet with colorful vegetables and a bold stir-fry sauce. Add the meat at the end to avoid overcooking. Great with beef, pork, or chicken—just keep it saucy.
- Tacos, wraps, or burritos: Shred or dice the meat and load it into soft tortillas with moisture-rich toppings like guacamole, slaw, grilled onions, or salsa. Think dry brisket tacos with lime crema and pickled onions.
- Quesadillas or grilled melts: Sandwich sliced meat with cheese and grilled veggies between tortillas or bread. The melted cheese adds moisture and richness to every bite. Leftover chicken or steak + sautéed peppers + sharp cheddar = fast dinner win.
- Soup or stew: Simmer chopped meat in a broth-based soup, chili, or stew. The liquid helps rehydrate the meat while layering on a new flavor. Try pork in pozole, beef in barley soup, or chicken in coconut curry.
- Breakfast hash: Cube the meat and pan-fry with diced potatoes, onions, and peppers. Top with a fried egg or hollandaise to add moisture and richness. Perfect for steak, roast beef, or grilled sausage.
- Shepherd’s pie or cottage pie: Finely chop the meat and mix with sautéed onions, peas, carrots, and gravy. Top with mashed potatoes and bake until golden. This is a great way to stretch leftovers into a full meal.
- Stuffed vegetables or baked potatoes: Combine chopped meat with rice, cheese, or sauce and stuff into peppers, zucchini, or baked potatoes. Roast until bubbly and hot. Try barbecue chicken in sweet bell peppers, or beef and rice in baked potatoes.
- Pita or flatbread pizza: Top naan or tortillas with sauce, meat, and cheese. Broil or grill until the cheese melts and the edges crisp up. Use tomato sauce, hummus, or BBQ sauce as a flavorful base.
- Croquettes, patties, or fritters: Mix minced meat with mashed potatoes or breadcrumbs, form into patties or balls, and pan-fry until golden. Serve with dipping sauce or aioli. Great for leftover chicken, pulled pork, or roast beef.
Adjust for Next Time
If your meat came out a little dry or not quite as tender as you’d hoped, don’t worry. A few minor tweaks can make a big difference on your next cook:
- Remove it from the heat a few degrees earlier
- Shorten the high-heat exposure time
- Add a butter baste
- Choose a fattier, better-marbled cut for more wiggle room
Tools That Help Without Breaking the Bank
You don’t need a top-tier grill or expensive gear to cook thick cuts well. Technique and temperature control matter more.
A basic charcoal grill or a standard gas grill can yield perfectly cooked, juicy results. Focus on mastering indirect heat, proper searing, and accurate temperature monitoring, and you’ll find that your existing tools are more than sufficient.
Smart Add-Ons for Better Results:
- Instant-read thermometer – for perfect doneness
- Cast-iron pan or griddle – helps develop a crust
- Grill gloves – safer for moving hot grates, pans, or coals
- Affordable tool kit – long-handled tongs, spatula, and grill brush
Quick Tips
Objective | Action |
Juicy Cuts | Choose marbled steaks, dry‑brine, and refrigerate |
Even Doneness | Use two‑zone heat or reverse sear |
Percision | Thermometer + lid closed control |
Flavor | Butter basting & resting |
Recovery | Reimagine dry steaks as new dishes |
Gear | Use simple, effective tools, or inventive substitutes |
Ready to sear your way to perfection?
Grilling thick meat isn’t about luck. It’s about smart setup, steady temps, and small techniques that make a big difference. From a juicy double-cut pork chop to a perfectly charred lamb loin, these methods give you the tools to grill confidently every time.
Explore more expert tips and gear up with exact-fit replacement parts and grilling accessories from Grill Spot.


